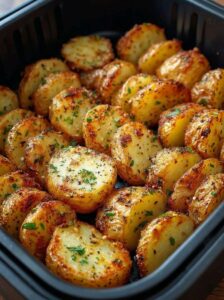
A beautifully prepared Air Fryer Blooming Onion is an impressive appetizer that combines dramatic presentation with crispy texture and sweet, tender onion petals. Although blooming onions are often associated with restaurants and deep-frying, you can create a delicious homemade version with an air fryer using much less oil.
The air fryer circulates hot air around the coated onion, helping the exterior become golden and crunchy while the onion itself softens and develops a naturally sweet flavor. The finished appetizer is especially delicious when served hot with a creamy, tangy dipping sauce.
This recipe is ideal for family dinners, weekend gatherings, game nights, holiday celebrations, potlucks, and casual parties. It also makes a fun centerpiece because the onion gradually opens into a flower-like shape during cooking.
Why You Will Love This Recipe
Crispy without deep frying: The air fryer gives the seasoned coating a satisfying crunch without requiring the onion to be submerged in a large quantity of oil.
Beautiful presentation: Once the petals open, the onion looks elaborate and restaurant-inspired, even though the preparation is straightforward.
Tender and flavorful: The onion becomes soft and naturally sweet inside while the outside develops a savory, crunchy coating.
Easy to customize: You can make the seasoning mild, spicy, smoky, cheesy, or herb-forward depending on your taste.
Choosing the Right Onion
The onion is the foundation of this recipe, so choose a large, firm sweet onion whenever possible. Vidalia onions are an excellent choice, but other large sweet onion varieties can also work well.
Look for an onion that:
- Feels firm and heavy for its size
- Has dry, intact outer skin
- Has no soft spots or bruises
- Is large enough to create substantial petals
An onion weighing approximately 12–16 ounces is a good size for this recipe.
Why the Root Must Stay Attached
The root is extremely important because it holds the onion layers together. When you cut the onion, the root acts as the central anchor that keeps the petals connected.
Removing too much of the base can cause the onion to fall apart during coating or cooking. Always make your cuts from the top toward the root and stop before reaching the bottom.
Creating the Blooming Shape
Start by removing the dry outer skin without cutting away the root. Trim a small portion from the top to create a flat surface.
Place the onion root-side down on a sturdy cutting board. Make several evenly spaced cuts from the top toward the root, stopping short of the base. Continue dividing the onion until you have roughly sixteen sections.
Gently pull the layers apart with your fingers. Work carefully because the individual petals can tear if they are forced apart too aggressively.
The objective is not to completely separate the onion. Instead, you want the sections to remain connected at the bottom while having enough space between them for the coating to reach the inner layers.
Building a Flavorful Coating
The coating has several layers, and each ingredient serves a purpose.
All-purpose flour provides the main structure and helps create a seasoned outer layer.
Paprika contributes color and mild peppery sweetness, while smoked paprika adds a subtle smoky character.
Garlic powder and onion powder increase the savory flavor and complement the natural taste of the onion.
Black pepper and salt provide basic seasoning.
Cayenne pepper is optional and can be adjusted according to your preferred level of heat.
The egg-and-milk mixture creates a moist surface that allows the breadcrumbs to adhere to the onion.
Finally, panko breadcrumbs provide a light, crunchy texture. Their larger flakes are particularly useful in an air fryer because they can become crisp without requiring deep frying.
The Creamy Dipping Sauce
A blooming onion is even better with a creamy dipping sauce. A simple combination of mayonnaise, ketchup, prepared horseradish, paprika, garlic powder, black pepper, and lemon juice creates a rich sauce with tangy, savory, and slightly spicy notes.
You can make the sauce milder by reducing the horseradish or increase the heat with hot sauce or additional cayenne.
For the best flavor, prepare the sauce while the coated onion is chilling so everything is ready when the onion comes out of the air fryer.
Tips for a Better Result
Coat between the petals. The seasoning and flour should reach as many layers as possible. This gives the finished onion a more consistent flavor.
Let excess egg mixture drip away. Too much liquid can make the coating slide from the petals.
Chill the coated onion. A short refrigerator rest helps the coating firm up and adhere more securely.
Preheat the air fryer. Starting with a hot cooking chamber helps the exterior crisp more efficiently.
Leave space around the onion. Good airflow is essential. If the onion is squeezed tightly into a small basket, some areas may remain pale or soft.
Use a light coating of oil. A small amount of cooking spray or brushed oil encourages browning and crispness.
Check the center. The outside may become golden before the thick inner petals are completely tender. Continue cooking until the center softens.
Flavor Variations
Cajun Blooming Onion
Add Cajun seasoning and a little extra paprika or chili powder to the flour mixture for a bold, spicy variation.
Parmesan Herb Blooming Onion
Combine panko breadcrumbs with finely grated Parmesan, dried parsley, and Italian seasoning for a savory, cheesy crust.
Spicy Southwest Version
Add chili powder, smoked paprika, and crushed red pepper for a stronger smoky and spicy profile.
Ranch-Style Version
Mix ranch seasoning into the flour mixture for a creamy herb-inspired flavor.
What to Serve With It
The blooming onion works well as a starter before grilled steak, burgers, barbecue chicken, pulled-pork sandwiches, fried chicken, fish, or roasted vegetables.
For a party, place the onion on a large serving platter and position the dipping sauce in the center. Serve it while hot so the contrast between the crunchy coating and tender onion is at its best.
Storage and Reheating
Blooming onions are best served immediately because the coating gradually loses its crispness as it sits.
If you have leftovers, allow the onion to cool completely before placing it in an airtight container. Refrigerate it for up to 2 days. Keep the dipping sauce in a separate covered container.
To restore some of the crispness, reheat the onion in an air fryer at 350°F (175°C) for approximately 4–6 minutes, checking it toward the end.
A microwave is not recommended for reheating because its steam tends to make the coating soft.
Common Mistakes
Cutting through the root: This can cause the petals to separate. Stop each cut before reaching the base.
Using excessive liquid: Too much egg mixture can prevent the coating from adhering properly.
Skipping the chilling step: The coating may be more likely to fall away if the onion is cooked immediately.
Overcrowding the air fryer: Poor airflow can produce uneven browning.
Using too little oil: Although the recipe does not require deep frying, a light amount of oil helps the panko become golden and crisp.
Serving too late: The texture is best shortly after cooking.
Recipe Information
Recipe: Air Fryer Blooming Onion
Category: Appetizer / Snack
Difficulty: Easy
Servings: 4–6
Prep Time: 30 minutes
Chill Time: 15 minutes
Cook Time: 18–25 minutes
Total Time: About 1 hour 10 minutes
Ingredients
For the Blooming Onion
- 1 large sweet onion, preferably Vidalia
- Cooking spray or approximately 2 tablespoons vegetable oil
Seasoned Flour
- 1 cup all-purpose flour
- 1 teaspoon paprika
- 1 teaspoon smoked paprika
- 1 teaspoon garlic powder
- 1 teaspoon onion powder
- 1 teaspoon salt
- ½ teaspoon black pepper
- ¼ teaspoon cayenne pepper, optional
Egg Mixture
- 2 large eggs
- ½ cup milk
Crispy Coating
- ½ cup panko breadcrumbs
Creamy Dipping Sauce
- ½ cup mayonnaise
- 2 tablespoons ketchup
- 1 tablespoon prepared horseradish
- ½ teaspoon paprika
- ¼ teaspoon garlic powder
- ¼ teaspoon black pepper
- 1 teaspoon fresh lemon juice
Equipment
- Air fryer
- Sharp kitchen knife
- Cutting board
- Mixing bowls
- Whisk
- Plate or tray
- Small spoon or spatula
Instructions
Step 1: Prepare the Onion
Remove the dry outer skin while keeping the root attached.
Trim approximately ½ inch from the top of the onion. Place the onion root-side down on a stable cutting board.
Make several cuts from the top toward the root, stopping before reaching the base. Continue making evenly spaced cuts until the onion has approximately sixteen sections.
Carefully separate the petals with your fingers without pulling them completely away from the root.
Step 2: Make the Seasoned Flour
Add the flour, paprika, smoked paprika, garlic powder, onion powder, salt, black pepper, and optional cayenne pepper to a bowl.
Whisk or stir thoroughly until the seasonings are evenly distributed throughout the flour.
Step 3: Prepare the Egg Mixture
Crack the eggs into a separate bowl and add the milk.
Whisk until the mixture is smooth and well combined.
Step 4: Coat the Onion
Place the prepared onion into the seasoned flour mixture.
Gently spread the petals apart and work the seasoned flour into the spaces between the layers.
Shake off excess flour.
Dip or brush the onion with the egg mixture, making sure the liquid reaches the inner petals. Allow excess mixture to drip away.
Coat the onion again with panko breadcrumbs. Press the breadcrumbs gently onto the petals so they adhere without breaking the onion apart.
Lightly spray the coated onion with cooking spray or brush it carefully with a small amount of oil.
Step 5: Chill the Coated Onion
Place the coated onion on a plate or tray and refrigerate it for approximately 15 minutes.
This short chilling period helps the coating become more stable before cooking.
Step 6: Preheat the Air Fryer
Preheat the air fryer to 375°F (190°C).
Preheating allows the coating to begin crisping as soon as the onion enters the basket.
Step 7: Air Fry
Place the onion root-side down in the air fryer basket.
Cook for approximately 10 minutes.
Carefully check the onion. If some areas look dry or pale, lightly spray them with cooking oil.
Continue air frying for another 8–15 minutes, depending on the size of the onion and the performance of your air fryer.
The blooming onion is ready when the coating is golden brown and crisp, the petals have opened, and the inner onion is tender.
Because air fryers vary, begin checking the onion near the lower end of the cooking range rather than relying only on the clock.
Step 8: Prepare the Dipping Sauce
While the onion cooks, combine the mayonnaise, ketchup, horseradish, paprika, garlic powder, black pepper, and lemon juice in a small bowl.
Stir until smooth and evenly combined.
Taste and adjust the seasoning if desired. Add a little more horseradish or hot sauce for additional heat.
Step 9: Serve
Carefully transfer the cooked blooming onion to a serving plate.
Place the dipping sauce in the center of the onion or serve it in a small bowl alongside it.
Serve immediately while the coating is warm and crisp.
Approximate Nutrition Per Serving
The following values are estimates and can vary according to onion size, brands, amount of oil absorbed, coating thickness, and serving size.
- Calories: Approximately 280–350
- Protein: Approximately 6 g
- Carbohydrates: Approximately 35 g
- Fat: Approximately 16 g
- Fiber: Approximately 3 g
- Sugar: Approximately 6 g
- Sodium: Approximately 600 mg
For more precise nutritional information, calculate the recipe using the exact brands and quantities used in your kitchen.
Best onion: Large sweet onion
Cooking method: Air fryer
Temperature: 375°F (190°C)
Chill time: 15 minutes
Cooking time: 18–25 minutes
Total time: About 1 hour 10 minutes
Servings: 4–6
Best served: Immediately with creamy dipping sauce
This homemade air fryer blooming onion delivers a crisp, seasoned exterior, tender sweet onion petals, and an impressive flower-like presentation without the need for deep frying. With careful cutting, thorough coating, proper chilling, and good air circulation, it makes an easy and memorable appetizer for almost any occasion.