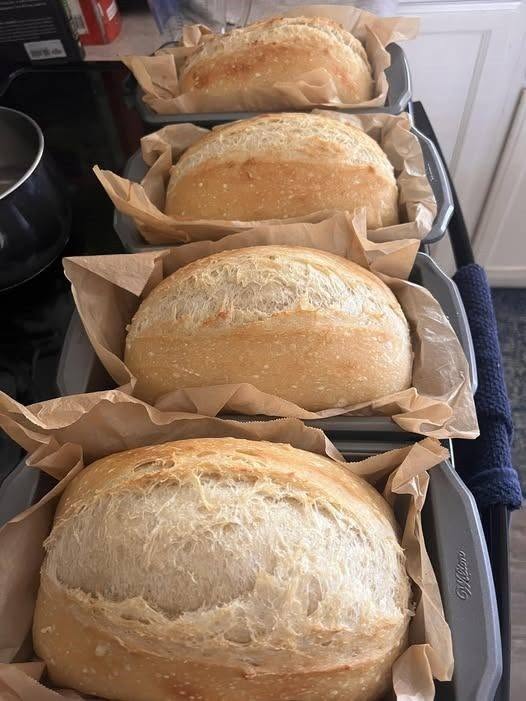
Making soft and fluffy gluten-free bread can be challenging because traditional bread relies on gluten to create elasticity, structure, and a chewy texture. This recipe uses carefully balanced gluten-free flours, starches, and binding ingredients to create a loaf that is light, tender, and moist.
The result is a homemade gluten-free bread with a delicate golden crust and a soft interior that stays fresh for days. It is perfect for everyday meals, including sandwiches, toast, breakfast spreads, and serving alongside soups or main dishes.
Unlike many gluten-free breads that can become dry or crumbly, this recipe focuses on creating a flexible crumb by using psyllium husk, proper mixing techniques, and the right balance of moisture. The dough is prepared differently from traditional wheat bread because gluten-free dough is naturally softer and more like a thick batter.
Ingredients
Dry Ingredients
- 3 cups gluten-free all-purpose flour blend with xanthan gum included
- 1 cup fine white rice flour
- ½ cup tapioca starch
- ¼ cup potato starch
- 2 tablespoons sugar
- 1 tablespoon baking powder
- 2 teaspoons instant yeast
- 1½ teaspoons salt
Wet Ingredients
- 2 large eggs, at room temperature
- 1¾ cups warm milk or warm dairy-free milk
- ¼ cup plain yogurt or dairy-free yogurt
- ¼ cup honey
- ¼ cup melted butter or neutral vegetable oil
- 1 teaspoon apple cider vinegar
- 1 teaspoon vanilla extract
Ingredient for Extra Soft Texture
- 2 tablespoons psyllium husk powder
- ¼ cup warm water
Equipment Needed
- Large mixing bowls
- Small bowl for psyllium mixture
- Stand mixer with paddle attachment or wooden spoon
- 9×5-inch loaf pan
- Spatula
- Wire cooling rack
Preparing the Psyllium Mixture
Begin by making the psyllium gel. This step is important because psyllium helps replace some of the structure that gluten normally provides.
Add psyllium husk powder to a small bowl and pour in warm water. Stir immediately until combined.
The mixture will quickly become thick and gel-like. Allow it to rest while preparing the remaining ingredients.
Mixing the Dry Ingredients
In a large bowl, combine:
- Gluten-free flour blend
- White rice flour
- Tapioca starch
- Potato starch
- Sugar
- Baking powder
- Instant yeast
- Salt
Mix thoroughly for several minutes. Even distribution of the ingredients helps create a consistent texture throughout the loaf.
Preparing the Wet Mixture
In another bowl, whisk the eggs until smooth.
Add:
- Warm milk
- Yogurt
- Honey
- Melted butter or oil
- Apple cider vinegar
- Vanilla extract
Whisk until the mixture becomes creamy and well combined.
Add the prepared psyllium gel and mix again. The mixture will become slightly stretchy and thick, which is expected and helps create a softer bread texture.
Creating the Gluten-Free Dough
Slowly pour the wet ingredients into the dry ingredients.
Mix using a stand mixer with a paddle attachment for approximately 5–7 minutes on medium speed.
If mixing by hand, stir strongly with a wooden spoon until all dry ingredients are incorporated.
The dough will not look like traditional bread dough. Instead, it should resemble thick cake batter. This softer consistency is normal and helps produce a lighter gluten-free loaf.
Avoid adding extra flour, even if the dough appears sticky.
Preparing the Loaf Pan
Grease a loaf pan generously with butter or oil.
Transfer the dough into the pan and smooth the surface using a spatula dipped in water. This prevents the dough from sticking and creates a more even top.
Cover the pan loosely with plastic wrap or a clean kitchen towel.
Rising the Dough
Place the dough in a warm location.
Allow it to rise for approximately:
60–90 minutes
The dough should noticeably expand and rise close to the top of the pan.
Gluten-free dough generally requires only one rise. Avoid allowing it to rise too long because overproofing can weaken the structure and cause the loaf to collapse during baking.
Baking Instructions
Preheat the oven to:
375°F (190°C)
Before baking, brush the top lightly with milk or melted butter for a softer crust.
Optional: sprinkle a small amount of rice flour on top for a rustic appearance.
Bake for:
45–55 minutes
The bread is ready when:
- The crust is golden brown
- The loaf feels firm
- The bottom sounds slightly hollow when tapped
If the top becomes too dark before the inside is fully baked, cover the loaf loosely with aluminum foil during the remaining baking time.
Cooling the Bread
Remove the bread from the oven and allow it to cool in the pan for about 10 minutes.
Carefully transfer it to a wire rack.
Allow the loaf to cool completely before slicing.
Gluten-free bread continues to set as it cools, and cutting it too early may create a sticky or gummy texture.
Tips for the Softest Gluten-Free Bread
- Use warm ingredients to encourage proper yeast activity.
- Do not skip psyllium husk or xanthan gum because they help create structure.
- Keep the dough moist rather than adding extra flour.
- Mix the dough thoroughly to improve texture.
- Allow enough cooling time before slicing.
- Measure gluten-free flours accurately for consistent results.
Room Temperature
Wrap the bread tightly and store at room temperature for up to 2 days.
Refrigerator
Keep the loaf refrigerated in an airtight container for up to 1 week.
Freezer
For longer storage:
- Slice the bread completely.
- Wrap individual slices.
- Freeze and toast slices directly from frozen when needed.
Flavor Variations
Cinnamon Raisin Breakfast Bread
Add:
- 1 teaspoon cinnamon
- ½ cup raisins
This creates a sweet loaf that works well with butter, cream cheese, or honey.
Herb Sandwich Bread
Add:
- 1 teaspoon dried oregano
- 1 teaspoon rosemary
- ½ teaspoon garlic powder
This version pairs well with soups, sandwiches, and savory meals.
Extra Rich Bread
Replace part of the milk with cream for a richer flavor and softer texture.
Extra Soft Potato Bread
Add:
- 2 tablespoons mashed potato
Mix it into the wet ingredients before combining with the dry ingredients.
Serving Suggestions
Enjoy this gluten-free bread with:
- Butter and honey
- Homemade jam
- Avocado toast
- Grilled cheese sandwiches
- French toast
- Breakfast sandwiches
- Soups and stews
- Toasted slices with eggs
Common Mistakes to Avoid
Using Cold Ingredients
Cold ingredients may slow yeast activity and prevent proper rising.
Skipping the Binder
Without psyllium or xanthan gum, gluten-free bread may become fragile and crumbly.
Adding Too Much Flour
Extra flour creates a heavy and dry loaf.
Slicing Too Soon
Cutting the bread while warm can make the inside appear gummy.
Description
A soft, airy, and moist gluten-free bread recipe with a golden crust and tender crumb. Perfect for sandwiches, toast, breakfast, and everyday meals.
Duration
- Preparation Time: 30 minutes
- Rising Time: 1 hour 30 minutes
- Baking Time: 45–55 minutes
- Total Time: About 3 hours
Servings
1 large loaf
Ingredients
Dry Ingredients
- 3 cups gluten-free all-purpose flour blend with xanthan gum
- 1 cup white rice flour
- ½ cup tapioca starch
- ¼ cup potato starch
- 2 tablespoons sugar
- 1 tablespoon baking powder
- 2 teaspoons instant yeast
- 1½ teaspoons salt
Wet Ingredients
- 2 large eggs
- 1¾ cups warm milk or dairy-free milk
- ¼ cup yogurt or dairy-free yogurt
- ¼ cup honey
- ¼ cup melted butter or vegetable oil
- 1 teaspoon apple cider vinegar
- 1 teaspoon vanilla extract
Softness Ingredient
- 2 tablespoons psyllium husk powder
- ¼ cup warm water
Instructions
- Mix psyllium husk powder with warm water and allow it to form a gel.
- Combine all dry ingredients in a large bowl.
- Whisk eggs, milk, yogurt, honey, butter, vinegar, and vanilla together.
- Add psyllium gel to the wet mixture.
- Combine wet and dry ingredients and mix thoroughly.
- Transfer the batter-like dough into a greased loaf pan.
- Allow the dough to rise for 60–90 minutes.
- Bake at 375°F (190°C) for 45–55 minutes.
- Cool completely before slicing.
- Store properly or freeze slices for later use.
Approximate Nutrition Per Slice
- Calories: 180
- Protein: 4 grams
- Carbohydrates: 32 grams
- Fat: 5 grams
- Fiber: 3 grams
This gluten-free bread creates a bakery-style loaf with a soft interior, gentle crust, and balanced texture. It is designed to stay tender and enjoyable for everyday breakfasts, lunches, and family meals.
